slidedeck2 screenshot
Estándar

slidedeck2 slider wordpress plugin review

So you need an easy to set up image slider? here it is the solution SlideDeck 2.
SlideDeck 2 is a wordpress plugin wich allow you to create sliders using images, video, text, and even custom HTML.

It’s ideal to show your photos (find an example below) from different sources (instagram, flickr,…),
you can also use it to show your customers product features, make an online presentation,…

A cool way to spice up your wordpress website without extra programming.

In less than two minutes I’ve included the slider with my instagram photos, SlideDeck 2 managed everything including the authorization process with instagram.
Then I only had to choose how many photos I want to display and insert into my post using the wordpress post editor.

[SlideDeck2 id=3806]

SlideDeck 2 is simple, powerful and easy to customize.

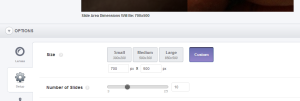
In the example I had to customize the width of my slider because of the width of the container, you can choose from predefined widths or type your own dimensions.

slidedeck2 customization

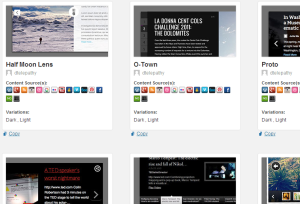
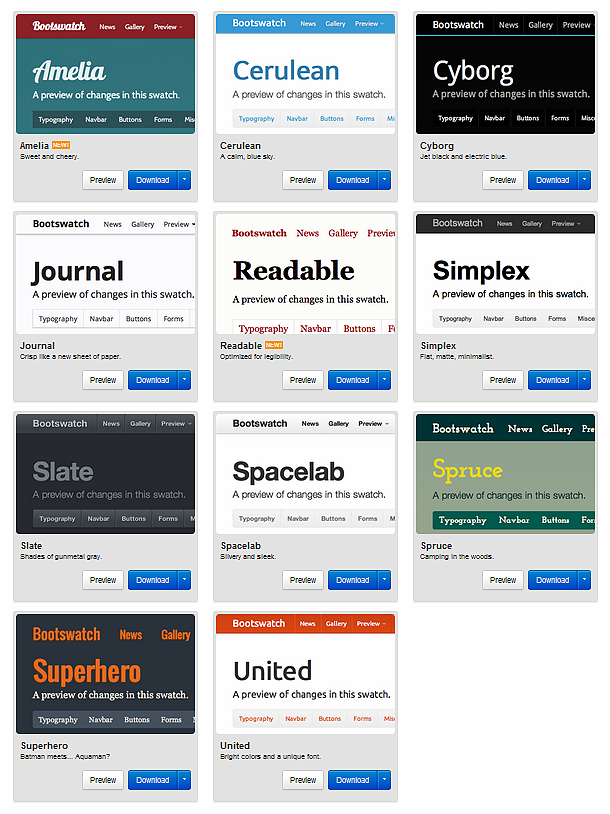
The «lenses» are predefined themes for your slider, you can choose from a wide range of them, and if you need more
personalization you can program one to match your style.

slidedeck2 lenses
slidedeck2 lenses

In the following example I’ve used SlideDeck2 to show product features, with images and text.

[SlideDeck2 id=3820]


And the last example, combining my 500px and flickr photos.

[SlideDeck2 id=3826]


I you like it , get more info and pricing by clicking on the baner below.


SlideDeck.js | Beautiful jQuery sliders in minutes

Estándar

Clase de dominio Grails con las provincias españolas

Aquí dejo una clase de dominio de Grails con todas las provincias españolas.

No es que sea tecnología de la NASA, pero es un rollo escribirla, y ya que no la he encontrado ya hecha,

la comparto para vuestro uso y disfrute.


1
2
3
4
5
6
7
8
9
10
11
12
13
14
15
16
17
18
19
20
21
22
23
24
25
26
27
28
29
30
31
32
33
34
35
36
37
38
39
40
41
42
43
44
45
46
47
48
49
50
51
52
53
54
55
56
57
58
59
60
61
62
63
64
65
66
67
68
69
class Provincia {
 
    String codigo
    String nombre
 
    static constraints = {
    }
 
    static void inicializar() {
    	if(!Provincia.findByCodigo('01')) {new Provincia(codigo:'01',nombre:'Álava').save(flush:true)}
    	if(!Provincia.findByCodigo('02')) {new Provincia(codigo:'02',nombre:'Albacete').save(flush:true)}
    	if(!Provincia.findByCodigo('03')) {new Provincia(codigo:'03',nombre:'Alicante').save(flush:true)}
    	if(!Provincia.findByCodigo('04')) {new Provincia(codigo:'04',nombre:'Almería').save(flush:true)}    	
    	if(!Provincia.findByCodigo('05')) {new Provincia(codigo:'05',nombre:'Ávila').save(flush:true)}
    	if(!Provincia.findByCodigo('06')) {new Provincia(codigo:'06',nombre:'Badajoz').save(flush:true)}
    	if(!Provincia.findByCodigo('07')) {new Provincia(codigo:'07',nombre:'Baleares').save(flush:true)}
    	if(!Provincia.findByCodigo('08')) {new Provincia(codigo:'08',nombre:'Barcelona').save(flush:true)}
    	if(!Provincia.findByCodigo('09')) {new Provincia(codigo:'09',nombre:'Burgos').save(flush:true)}
    	if(!Provincia.findByCodigo('10')) {new Provincia(codigo:'10',nombre:'Cáceres').save(flush:true)}
 
    	if(!Provincia.findByCodigo('11')) {new Provincia(codigo:'11',nombre:'Cádiz').save(flush:true)}
    	if(!Provincia.findByCodigo('12')) {new Provincia(codigo:'12',nombre:'Castellón').save(flush:true)}
    	if(!Provincia.findByCodigo('13')) {new Provincia(codigo:'13',nombre:'Ciudad Real').save(flush:true)}
    	if(!Provincia.findByCodigo('14')) {new Provincia(codigo:'14',nombre:'Córdoba').save(flush:true)}
    	if(!Provincia.findByCodigo('15')) {new Provincia(codigo:'15',nombre:'Coruña (La)').save(flush:true)}
    	if(!Provincia.findByCodigo('16')) {new Provincia(codigo:'16',nombre:'Cuenca').save(flush:true)}
    	if(!Provincia.findByCodigo('17')) {new Provincia(codigo:'17',nombre:'Gerona').save(flush:true)}
    	if(!Provincia.findByCodigo('18')) {new Provincia(codigo:'18',nombre:'Granada').save(flush:true)}
    	if(!Provincia.findByCodigo('19')) {new Provincia(codigo:'19',nombre:'Guadalajara').save(flush:true)}
    	if(!Provincia.findByCodigo('20')) {new Provincia(codigo:'20',nombre:'Guipuzcoa').save(flush:true)}
 
    	if(!Provincia.findByCodigo('21')) {new Provincia(codigo:'21',nombre:'Huelva').save(flush:true)}
    	if(!Provincia.findByCodigo('22')) {new Provincia(codigo:'22',nombre:'Huesca').save(flush:true)}
    	if(!Provincia.findByCodigo('23')) {new Provincia(codigo:'23',nombre:'Jaen').save(flush:true)}
    	if(!Provincia.findByCodigo('24')) {new Provincia(codigo:'24',nombre:'León').save(flush:true)}
    	if(!Provincia.findByCodigo('25')) {new Provincia(codigo:'25',nombre:'Lérida').save(flush:true)}
    	if(!Provincia.findByCodigo('26')) {new Provincia(codigo:'26',nombre:'Rioja (La)').save(flush:true)}
    	if(!Provincia.findByCodigo('27')) {new Provincia(codigo:'27',nombre:'Lugo').save(flush:true)}
    	if(!Provincia.findByCodigo('28')) {new Provincia(codigo:'28',nombre:'Madrid').save(flush:true)}
    	if(!Provincia.findByCodigo('29')) {new Provincia(codigo:'29',nombre:'Málaga').save(flush:true)}
    	if(!Provincia.findByCodigo('30')) {new Provincia(codigo:'30',nombre:'Murcia').save(flush:true)}
 
    	if(!Provincia.findByCodigo('31')) {new Provincia(codigo:'31',nombre:'Navarra').save(flush:true)}
    	if(!Provincia.findByCodigo('32')) {new Provincia(codigo:'32',nombre:'Orense').save(flush:true)}
    	if(!Provincia.findByCodigo('33')) {new Provincia(codigo:'33',nombre:'Asturias').save(flush:true)}
    	if(!Provincia.findByCodigo('34')) {new Provincia(codigo:'34',nombre:'Palencia').save(flush:true)}
    	if(!Provincia.findByCodigo('35')) {new Provincia(codigo:'35',nombre:'Palmas (Las)').save(flush:true)}
    	if(!Provincia.findByCodigo('36')) {new Provincia(codigo:'36',nombre:'Pontevedra').save(flush:true)}
    	if(!Provincia.findByCodigo('37')) {new Provincia(codigo:'37',nombre:'Salamanca').save(flush:true)}
    	if(!Provincia.findByCodigo('38')) {new Provincia(codigo:'38',nombre:'Tenerife (S.C.)').save(flush:true)}
    	if(!Provincia.findByCodigo('39')) {new Provincia(codigo:'39',nombre:'Cantabria').save(flush:true)}
    	if(!Provincia.findByCodigo('40')) {new Provincia(codigo:'40',nombre:'Segovia').save(flush:true)}
 
    	if(!Provincia.findByCodigo('41')) {new Provincia(codigo:'41',nombre:'Sevilla').save(flush:true)}
    	if(!Provincia.findByCodigo('42')) {new Provincia(codigo:'42',nombre:'Soria').save(flush:true)}
    	if(!Provincia.findByCodigo('43')) {new Provincia(codigo:'43',nombre:'Tarragona').save(flush:true)}
    	if(!Provincia.findByCodigo('44')) {new Provincia(codigo:'44',nombre:'Teruel').save(flush:true)}
    	if(!Provincia.findByCodigo('45')) {new Provincia(codigo:'45',nombre:'Toledo').save(flush:true)}
    	if(!Provincia.findByCodigo('46')) {new Provincia(codigo:'46',nombre:'Valencia').save(flush:true)}
    	if(!Provincia.findByCodigo('47')) {new Provincia(codigo:'47',nombre:'Valladolid').save(flush:true)}
    	if(!Provincia.findByCodigo('48')) {new Provincia(codigo:'48',nombre:'Vizcaya').save(flush:true)}
    	if(!Provincia.findByCodigo('49')) {new Provincia(codigo:'49',nombre:'Zamora').save(flush:true)}
    	if(!Provincia.findByCodigo('50')) {new Provincia(codigo:'50',nombre:'Zaragoza').save(flush:true)}
 
    	if(!Provincia.findByCodigo('51')) {new Provincia(codigo:'51',nombre:'Ceuta').save(flush:true)}
    	if(!Provincia.findByCodigo('52')) {new Provincia(codigo:'52',nombre:'Melilla').save(flush:true)}
 
    }
}

Para inicializar la tabla en la base de datos, yo la llamo en el BootStrap.groovy


1
Provincia.inicializar();

Espero que os sea útil


Estándar

Instruct Groovy HTTPBuilder to handle a JSON response with wrong content type

While developing a utility script to monitor my mobile data consumed, I found a problem with

the response I was getting from the server. It content-type was set to ‘text/json’ instead of ‘application/json’, ‘application/javascript’ or ‘text/javascript’ wich are the content types used by HTTPBuilder to parse a response as JSON.

To solve this problem, one must add a new content type to the ParserRegistry and parse the response.

There are two ways to do it:

1
2
3
4
5
6
def httpBuilder = new HTTPBuilder(baseUrl)
 
httpBuilder.parser.'text/json' = { resp ->
   def bufferedText = resp.entity.content.getText( ParserRegistry.getCharset( resp ) ).trim()
   return new JsonSlurper().parseText( bufferedText )
}

The second ( reuse default )

1
2
def httpBuilder = new HTTPBuilder(baseUrl)
httpBuilder.parser.'text/json' = httpBuilder.parser.'application/json'

Now everything works again.

See you

groovy-logo-medium
Estándar

zip files the groovy way

I’ve been told to perform some maintenace into one chaotic directory.

This directory stores about 225000 plain text files per month without any structure (yes I know, don’t ask). Try to do a simple ls into this directory after one year of files to realize that there is a problem.

We decided to create a monthly zip archive to store the files (based on it last modified date) while trying to explain the problem to the process «developer????»

Maybe you can do it with shell scripting , but I’ve chosen groovy.

There are a lot of improvements to do ( exception handling, validate parameters,… ), but it’s a starting point and worked fine for me. Feel free to change the script and share your improvements or comments.

Here is the script:

1
2
3
4
5
6
7
8
9
10
11
12
13
14
15
16
17
18
19
20
21
22
23
24
25
26
27
28
29
30
31
32
33
34
35
36
37
38
39
40
41
42
43
44
45
46
47
48
import java.text.*
import org.codehaus.groovy.runtime.TimeCategory
import org.apache.tools.zip.ZipOutputStream
import org.apache.tools.zip.ZipEntry
//import org.apache.tools.tar.TarOutputStream
//import org.apache.tools.tar.TarEntry
 
//"2011-04-01"
 
def startd = new SimpleDateFormat("yyyy-MM-dd").parse(args[0])
def endd = startd
 
use(TimeCategory) {
    endd = startd + 1.month
}
 
println "Archiving files between $startd and $endd"
 
def period = {file -> new Date(file.lastModified()) > startd && new Date(file.lastModified()) < endd  } def thefiles = new File(args[1]).listFiles().toList().findAll(period) if( thefiles.size > 0 ){
 
    ByteArrayOutputStream baos = new ByteArrayOutputStream()
    ZipOutputStream zipFile = new ZipOutputStream(baos)
 
    thefiles.each{
       if( it.isFile() ){
          zipFile.putNextEntry(new ZipEntry(it.name))
 
          it.withInputStream { i ->
            zipFile << i
          }
 
          zipFile.closeEntry()
       }
    }
    zipFile.finish()
 
    def month = startd.format('yyyyMM')
 
    OutputStream outputStream = new FileOutputStream ( "${args[1]}/backup.${month}.zip" )
    baos.writeTo(outputStream)
    thefiles.each{
        it.delete()
    }
    println "${thefiles.size} files archived into ${args[1]}/backup.${month}.zip "
 
}else{
    println "No files found for given date  "
}

To execute it, simply run

1
groovy monthly_files.groovy 2012-07-01 /path/to/directory

Specify as parameters the first day of month to process, and the path to the directory containing the files to archive.

If the amount of files is very large you’ll have to give more memory to the JVM

1
export JAVA_OPTS="-Xmx2048m -XX:MaxPermSize=128m"

Hope you find it useful

Estándar

box-shadow en dispositivos iOS

Realizando un formulario en HTML para una página web, se producía un comportamiento extraño en dispositivos iOS.

Los campos de texto no mostraban la sombra que le estaba indicando el css.


1
2
3
4
5
6
#contactForm input[type="text"] {
width: 250px; background-color:#fff; border:0; padding: 10px;font-size: .7em;
-webkit-box-shadow: 1px 2px 3px #7f7f80; 
-moz-box-shadow: 1px 2px 3px #7f7f80; 
box-shadow: 1px 2px 3px #7f7f80;
}

Para solucionarlo hay que incluir en el css el código necesario para modificar el comportamiento nativo del elemento:

1
-webkit-appearance: none;

El código del ejemplo anterior modificado

1
2
3
4
5
6
7
#contactForm input[type="text"] {
width: 250px; background-color:#fff; border:0; padding: 10px;font-size: .7em;
-webkit-appearance: none;
-webkit-box-shadow: 1px 2px 3px #7f7f80; 
-moz-box-shadow: 1px 2px 3px #7f7f80; 
box-shadow: 1px 2px 3px #7f7f80;
}
Estándar

Grails LDAP authentication and authorization

Today I’ve been investigating how to integrate a Grails aplication with an LDAP server to perform authentication and authorization.

There are several plugins available to do the authentication in a grails way.

My choice is Spring Security Core Plugin because it is mature and has several extension plugins to extend the functionality and provide integrations with external systems like Facebook, Twitter, OpenId and LDAP .

Installation and configuration are very well documented at : http://grails-plugins.github.com/grails-spring-security-core/docs/manual/

Peter Ledbrook wrote a great introductory article Simplified Spring Security with Grails .

I’ve updated the example application in the post to do the authentication using an LDAP Server.

My server has the following structure:

Sample LDAP structure

Yo can download the sample.ldif

Once you have all the LDAP structure, install the extension LDAP plugin for Spring Security Core

1
grails install-plugin spring-security-ldap

Now modify Config.groovy adding the specific configuration for LDAP spring-security-ldap

1
2
3
4
5
6
7
8
9
10
11
grails.plugins.springsecurity.providerNames = ['ldapAuthProvider','anonymousAuthenticationProvider','rememberMeAuthenticationProvider']
grails.plugins.springsecurity.ldap.context.managerDn = 'uid=admin,ou=system'
grails.plugins.springsecurity.ldap.context.managerPassword = 'YOUR_PASSWORD'
grails.plugins.springsecurity.ldap.context.server = 'ldap://10.99.8.135:10389'
grails.plugins.springsecurity.ldap.authorities.groupSearchBase = 'ou=Groups,dc=example,dc=com'
grails.plugins.springsecurity.ldap.authorities.retrieveGroupRoles = true
grails.plugins.springsecurity.ldap.authorities.retrieveDatabaseRoles = false
grails.plugins.springsecurity.ldap.authorities.groupSearchFilter = 'member={0}'
grails.plugins.springsecurity.ldap.search.base = 'dc=example,dc=com'
grails.plugins.springsecurity.ldap.search.attributesToReturn = ['mail', 'cn', 'sn', 'givenName', 'jpegPhoto' , 'telephoneNumber']
grails.plugins.springsecurity.ldap.authenticator.attributesToReturn = ['mail', 'cn', 'sn', 'givenName', 'jpegPhoto' , 'telephoneNumber']


Now you are ready to authenticate against your LDAP, also the group membership is readed from LDAP.

In the expample application the sec tag lib is used to show a link to the create post action based on the role of the logged user.

1
2
3
<sec:ifAllGranted roles="ROLE_USER">
  <g:link controller="post" action="timeline">My Timeline</g:link>
</sec:ifAllGranted>

How is this managed if you are using an LDAP? the answer is simple as everything in grails. Create a group in your LDAP named USER and add the users to it.

1
2
3
4
5
6
7
8
9
10
11
12
13
14
dn: cn=USER,ou=Groups,dc=example,dc=com
objectClass: groupOfNames
objectClass: top
cn: USER
description: USER_ROLE
member: uid=wpauli,ou=Users,dc=example,dc=com
member: uid=aeinstein,ou=Users,dc=example,dc=com
member: uid=mborn,ou=Users,dc=example,dc=com
member: uid=mcurie,ou=Users,dc=example,dc=com
member: uid=sito,ou=Users,dc=example,dc=com
createTimestamp: 20111121102018Z
creatorsName: 0.9.2342.19200300.100.1.1=admin,2.5.4.11=system
modifiersName: 0.9.2342.19200300.100.1.1=admin,2.5.4.11=system
modifyTimestamp: 20111121110901Z

I’ve added to the application some other properties that came from LDAP ( Photo, Telephone number, Full Name ).

This is done extending the org.springframework.security.core.userdetails.User to add all new attributes:


1
2
3
4
5
6
7
8
9
10
11
12
13
14
15
16
17
18
19
20
21
22
23
24
25
import org.springframework.security.core.GrantedAuthority
import org.springframework.security.core.userdetails.User
 
class MyUserDetails extends User {
 
    // extra instance variables final String fullname final String email final String title
    String fullname
    String email
    String title
    String phone
 
    byte[] photo
 
    MyUserDetails(String username, String password, boolean enabled, boolean accountNonExpired, boolean credentialsNonExpired, boolean accountNonLocked, Collection authorities, String fullname, String email, String title, byte[] photo, String phone) {
 
        super(username, password, enabled, accountNonExpired, credentialsNonExpired, accountNonLocked, authorities)
 
        this.fullname = fullname
        this.email = email
        this.title = title
        this.photo = photo
        this.phone = phone
    }
 
}

And providing your own implementation for the org.springframework.security.ldap.userdetails.UserDetailsContextMapper interface.

1
2
3
4
5
6
7
8
9
10
11
12
13
14
15
16
17
18
19
20
21
22
23
24
25
26
27
28
29
30
31
32
33
import org.springframework.ldap.core.DirContextAdapter
import org.springframework.ldap.core.DirContextOperations
import org.springframework.security.core.userdetails.UserDetails
import org.springframework.security.ldap.userdetails.UserDetailsContextMapper
/**
 *
 * @author SiTo
 */
 
class MyUserDetailsContextMapper implements UserDetailsContextMapper {
 
    UserDetails mapUserFromContext(DirContextOperations ctx, String username, Collection authorities) {
 
        String fullname = ctx.originalAttrs.attrs['cn'].values[0]
        String email = ctx.originalAttrs.attrs['mail'].values[0].toString().toLowerCase()
 
        def title = ctx.originalAttrs.attrs['sn']
 
        def phone = ctx.getStringAttribute('telephoneNumber')
 
        byte[] photo = (byte[])ctx.getObjectAttribute('jpegPhoto')
 
        def userDetails = new MyUserDetails(username, '', true, true, true, true,
            authorities, fullname, email, title == null ? '' : title.values[0], photo, phone)
 
        return userDetails
    }
 
    void mapUserToContext(UserDetails user, DirContextAdapter ctx) {
        throw new IllegalStateException("Only retrieving data from LDAP is currently supported")
    }
 
}

The final step is register the custom implementation using the Spring DSL in the resources.groovy file

1
2
3
4
5
beans = {
   ldapUserDetailsMapper(MyUserDetailsContextMapper) {
      // bean attributes
   }
}

Now we are ready to use all new properties that are maintained by the LDAP into our app.

For example, show the Photo of the logged user:

Add the following method to your PersonController.groovy

1
2
3
4
5
6
7
8
9
10
11
12
13
14
15
16
17
18
19
20
21
22
23
class PersonController {
 
    def springSecurityService
 
    // PersonController CODE
 
    def photo = {
        def userDetails = springSecurityService.principal
        def photo = new File(GrailsResourceUtils.WEB_APP_DIR  + "/images/person.jpg").readBytes()
 
        if( userDetails.photo != null ){
            photo = userDetails.photo
        }
 
        response.outputStream << photo
        response.setHeader("Content-disposition", "attachment; filename=avatar.jpg")
        response.contentType = 'image/jpeg'
        response.outputStream << photo
        response.outputStream.flush()
        return;
 
    }
}

And modify the main.gsp to show the photo:


1
2
3
4
         <sec:ifLoggedIn>
          Hola <sec:loggedInUserInfo field="fullname"/> [<sec:loggedInUserInfo field="phone"/>] (<g:link controller="logout">Salir</g:link>)
          <img src="${createLink(controller:'person', action:'photo')}" width="40px" />
         </sec:ifLoggedIn>


Done!


This is how it looks:

That’s all…

Grails Rocks!

See you.
Estándar

DomPdf y las imagenes

Para un proyecto en PHP tenía que generar unos PDF’s.

De casualidad encontré la una librería para la generación de PDF’s llamada dompdf usando como plantilla un HTML.

La librería funciona genial y es muy facil de usar, pero me ha dado un pequeño quebradero de cabeza. Incluir imágenes.

Por si a alguien le sirve, parece que a DomPDF no le gustan las rutas absolutas para insertar imágenes. He probado diferentes versiones y la única manera de hacerlo funcionar es poner la ruta relativa a la raiz del dominio.

En vez de:

1
<img src="http://eldominio.es/images/laimagen.jpg" alt="" />

usar:

1
<img src="./images/laimagen.jpg"/>


Estándar

Imagemagick y shell script para juntar imagenes

Hola,

hoy toca un trocillo de código que puede ser bastante util.

Me hacía falta juntar 60 imágenes de dos en dos para el proyecto de descucheck.es así que con un par de preguntas a google, he dado con el comando para realizar el «montage» usando ImageMagick .

1
montage 2.png 2t.png -tile 2x1 -geometry +0+0 2j.png

Un pequeño script en la línea de comandos, y en unos pocos segundos el resultado deseado.

1
for ((i=2;i<30;i++)); do montage $i.png $i"t.png" -tile 2x1 -geometry +0+0 $i"j.png"; done

Espero que os sea de utilidad.